Friday, May 24, 2013

Chocolate Brownies

Chocolate Brownies


It has been about two weeks since my last blog post. I have been pretty busy with everything lately from coaching lacrosse, school, and my boyfriend just recently graduated college! This weekend (Memorial Day Weekend) is also going to be pretty busy so that's why this weeks recipe is super simple, but can be a sweet treat to bring on a picnic or family get together for this busy weekend! So after this weekend it will be back to baking and more complicated recipes! 

Yields: About 12 brownies


Ingredients:

1/2 cup vegetable oil
1 cup white sugar
1 teaspoon vanilla extract
2 eggs
1/2 cup all-purpose flour
1/3 cup unsweetened cocoa powder
1/4 teaspoon baking powder
1/4 teaspoon salt
1/2 cup chopped walnuts (optional)


Directions for Brownies:

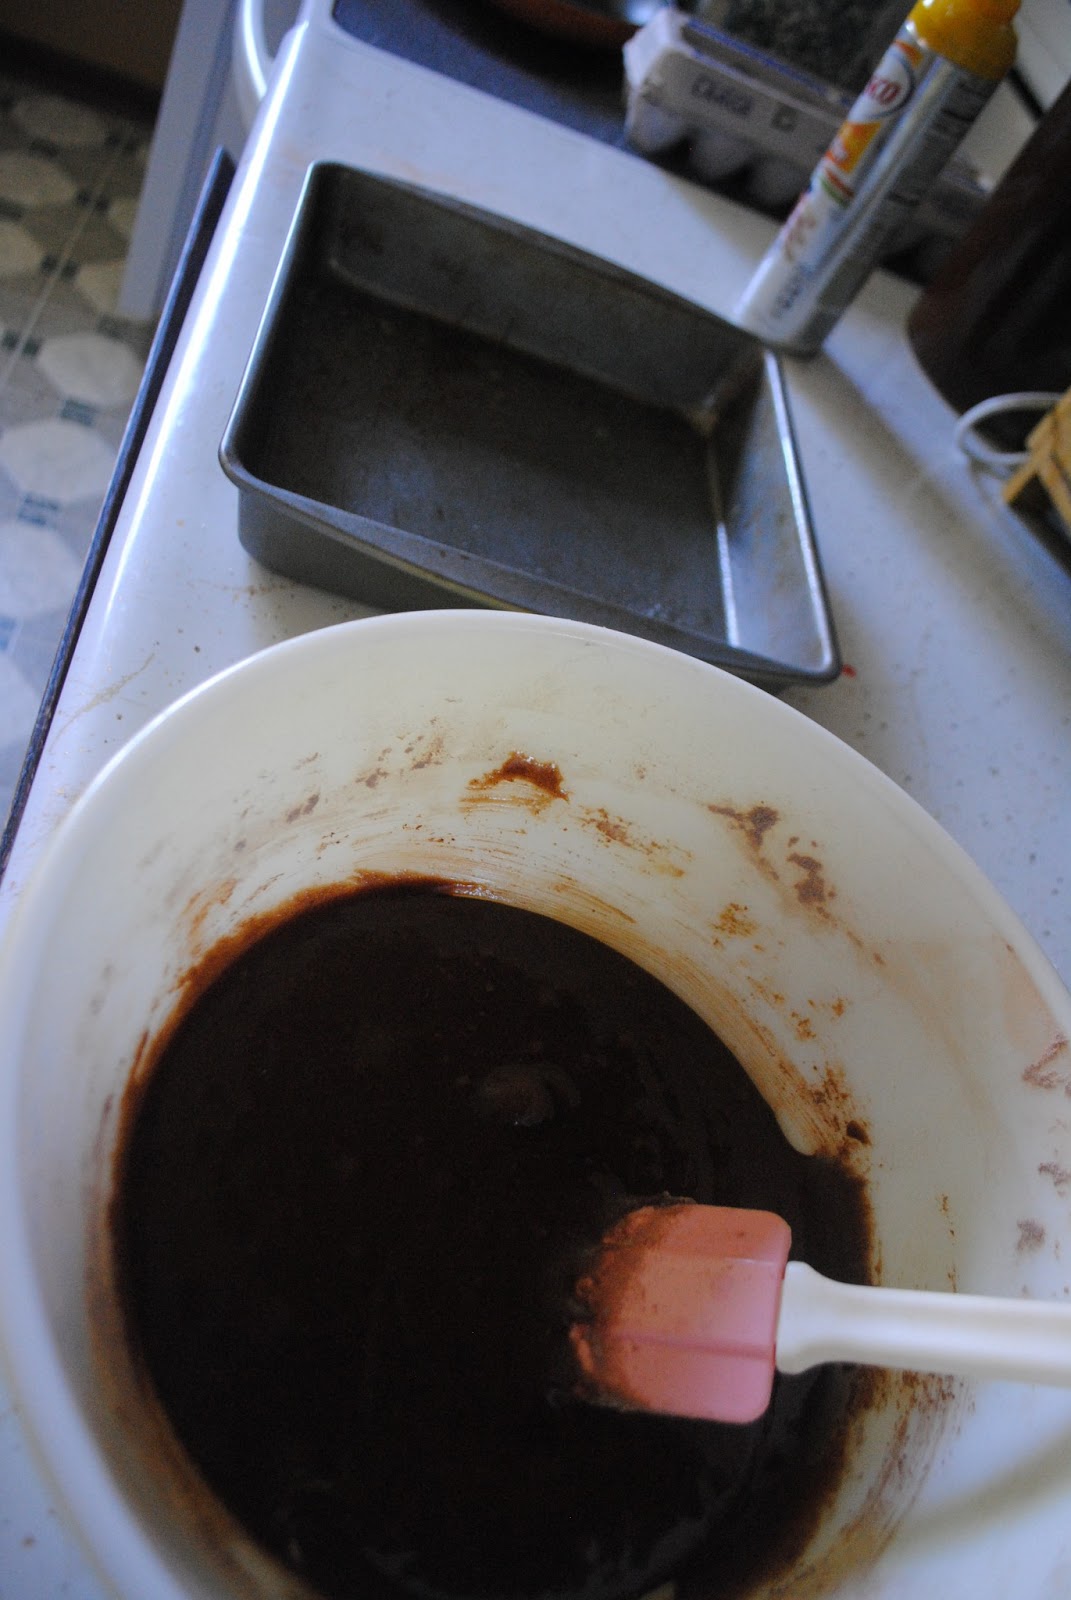
  1. Preheat oven to 350 degrees. Grease a 9x9 inch baking pan.
  2. In a medium bowl, mix together the oil, sugar, and vanilla. 
  3. In a separate bowl combine flour, cocoa, baking powder, and salt; gradually stir into the egg mixture until well blended. Stir in walnuts, if desired.
  4. Spread the batter evenly into the prepared pan.
  5. Bake for 20 to 25 minutes, or until the brownie begins to pull away from edges of pan. Let cool on a wire rack before cutting into squares.

Sunday, May 5, 2013

Chocolate Cupcakes

Chocolate Cupcakes


Who doesn't like chocolate and chocolate buttercream?! These cupcakes are soft and melt right in your mouth! You can make cute little candies to go with them like I did. These are super sweet and taste amazing. I made these for a party for for Iron Man 3. (It was an amazing movie!) These were gone within the hours they were so good! They are pretty easy and quick to make if you have the time. 

Yields: 12 regular sized cupcakes


Ingredients:

For the Cupcakes:
1 cup granulated sugar
3/4 cup plus 2 tablespoons unsweetened cocoa powder, sifted
3/4 teaspoon baking powder
3/4 teaspoon baking soda
1/2 teaspoon salt
1 large egg, room temperature
1/2 cup sour cream, room temperature
1/4 cup canola oil
1 tablespoon vanilla extract
1/2 cup boiling water

For the Chocolate Buttercream:
2 sticks unsalted butter, room temperature
2 cups powdered sugar, sifted
1 teaspoon vanilla extract
2 tablespoons heavy cream
1/2 cup unsweetened cocoa powder, sifted
2 tablespoons chocolate sprinkles

Ingredients for cupcakes

Directions for Cupcakes:

  1. Preheat oven to 350 degrees. Grease muffin tin or line with muffin liners.
  2. In a large bowl, mix together sugar, flour, cocoa powder, baking powder, baking soda and salt.
  3. Crack in the egg spoon in the sour cream, and pour in the oil and the vanilla, Mix with wooden spoon until just combined. 
  4. Pour in the boiling water, and slowly mix until smooth.
  5. Divide batter evenly among prepared muffin cups, about halfway full. Transfer muffin tin to oven and bake for 15 to 18 minutes. Transfer muffin tin to a wire rack and let cupcakes cool completely


Directions for Frosting:

  1. Beat butter for a few minutes in a standing mixer with the paddle attachment on medium speed.
  2. Add powdered sugar and turn and mixer on low, beat until the sugar incorporates with the butter.
  3. Add vanilla, heavy cream and cocoa powder, beat on medium speed for another 3 minutes, or until buttercream becomes light and fluffy.
  4. Frost the cupcakes with the buttercream and garnish with chocolate sprinkles.

These cupcakes turn out great! I made these for a party so I had to double the recipe which is super easy to do. I do need to work on my frosting skills but I had a lot of fun making these. Cupcakes are always fun to make. Instead of using sprinkles I made white chocolate candies with a candy mold I bought. It was definitely a tedious thing to do but it will make your cupcakes look cute! 

Enjoy!


Source:http://ohsweetday.com/2013/03/my-best-chocolate-cupcake.html 

Sunday, April 28, 2013

Deep Fried Cheese Curds

Deep Fried Cheese Curds


So I know deep fried cheese curds is not a pastry. But.... Bryan and I both love going to Culvers and getting cheese curds, so this weekend Bryan had the idea to make homemade cheese curds! These cheese curds are so delicious! If you like fair food you will love these cheese curds! They are a great appetizer to go with a dinner or if you need something at a party these are excellent!

Yields: Serves Many


Ingredients:

Vegetable oil for frying
1 egg, beaten
1 tablespoon vegetable oil
1 cup of milk or beer
1 cup all-purpose flour
1 teaspoon granulated sugar
1/4 teaspoon salt
1 teaspoon baking powder
1 9 oz. package of fresh cheese curds, room temperature


Directions:

  1. In a deep fryer or large pot, heat vegetable oil.
  2. In a medium bowl, combine egg, 1 tablespoon vegetable oil, and milk OR beer until well blended.
  3. Add flour, sugar, salt, and baking powder; mix until smooth
  4. Drop cheese curds in batter. Using a spoon, turn cheese curds to coat thoroughly.
  5. A few at a time, drop the coated curds into the hot oil; fry around 1 minute or until golden brown and puffed, turn to coat all sides. 
    My Sous-Chef frying up the cheese curds

Saturday, April 20, 2013

Baked Cinnamon and Sugar Churros

Baked Cinnamon and Sugar Churros


If you are ever in the mood for a churro make this recipe! It is super quick and easy to make. It is crunchy on the outside and a chew inside! If you have tried the chimichanga recipe you can use left over cinnamon sugar if you like! It is the same as what goes on the chimichangas.

Yields: 12 Churros


Ingredients:

For the Churros:
1 cup of water
1/2 cup light butter spread
4 tablespoons granulated sugar, divided
1/2 teaspoon salt
1 cup all-purpose flour
1 egg
1/2 teaspoon ground cinnamon

Ingredients for Churros 

Directions:

  1. Preheat the oven to 350 degrees. Coat a large baking sheet with cooking spray.
  2. In a medium saucepan, combine the water, butter spread, 2 tablespoons of sugar, and 1/2 teaspoon of salt. Set the pan over medium-high heat and bring to a boil.
  3. Remove the pan from the heat and stir in the flour with a wooden spoon. Stir until the mixture forms a ball. Stir in the egg until the mixture is smooth and glossy.
  4. Transfer the dough to a pastry bag or freezer bag fitted with a large tip (preferably star-shaped). Pipe the dough onto the prepared baking sheet, making 12, 8-inch long strips. Baking for 20-30 minutes, until the churros are golden brown.
    Make sure your plastic bag is strong enough!
  5. Meanwhile, in a small bowl, combine the remaining 2 tablespoons of sugar and cinnamon.
  6. Spray the baked churros with cooking spray and sprinkle the cinnamon-sugar mixture over top. Flip the churros and repeat on the other side. Serve warm. 

Finished Result!
I enjoyed making these churros a lot this week. I had my boyfriend Bryan help me make these this week and they were very yummy! Super easy to make and quick. These are great for a quick snack or for a fun treat for a special occasion. Bryan definitely made this recipe fun just by singing about churros and playing his guitar. I hope everyone finds this recipe fun and as good as I did!

Enjoy!
C-H-U-R-R-O spells Churro!


Source: http://what2cook.net/2013/04/09/baked-cinnamon-and-sugar-churros/

Tuesday, April 9, 2013

Homemade Strawberry Pop Tarts

Homemade Strawberry Pop Tarts


I recently found this recipe on Pinterest and had to make my own pop tarts right away! They taste a lot better than what you get in a box from the grocery store. Its easy to make and doesn't take up a whole afternoon like some recipes I have recently made. This is definitely a recipe you want to try! 

Yield: 6-7 Pop Tarts


Ingredients:

For the Pie Crust:
1 1/2 cups sifted flour
1/2 teaspoon salt
1/4 cup shortening OR 1/4 cup unsalted butter
4 tablespoons cold water
Strawberry Jam

For the Glaze:
1 cup powder sugar
3 tablespoons milk
Sprinkles

Ingredients for Pie Crust

Directions for Pie Crust:

  1. Combine flour and salt in bowl. Add shortening OR butter and blend with fork, or your fingers until mixture is fairly coarse.
  2. Add water 1 tablespoon at a time. Gently mixing the dough after each addition until dough forms a ball.
  3. Place dough on a lightly floured surface and roll into a rectangle. Cut out long strips about 2 inches wide, and 3 inches long.
  4. Repeat until you run out of dough.
  5. Preheat oven to 450 degrees.
  6. Take one pie crust rectangle and fill with a teaspoon of jam. Cover with another piece of pie crust. Crip all four edges
  7. Repeat step 6 until you run out of pie crust.
  8. Bake for 7-8 minutes or until slightly brown.
    Allow for Pop Tarts to cool before glazing them.

Directions for Glaze:

  1. Place powdered sugar in bowl. Pour milk slowly until it has a consistency of really thick syrup. (About 3 tablespoons)
  2. Once Pop Tarts are cooled pour glaze onto Pop Tarts and decorate with sprinkles.


Sunday, April 7, 2013

Homemade Waffles

Homemade Waffles


So recently I have been obsessed with waffles. I have been eating them for lunch a lot! So this morning I woke up and wanted waffles but we were out of mix, so I found this recipe to make homemade waffles. These are so much better than from a box! I will never be making waffles from a box anymore! They are fluffy, moist, and have a little sweetness to them. Also from my last recipe the apple chimichangas I had left over apple pie filling. I had no idea what I was going to do with the leftovers so it worked out perfectly that I wanted waffles this morning!

Yields: 6 Waffles


Ingredients:

2 eggs
2 cups all-purpose flour
1 3/4 cups milk
1/2 cup vegetable oil
1 tablespoon white sugar
4 teaspoons baking powder
1/4 teaspoon salt
1/2 teaspoon vanilla extract

Ingredients for Waffles

Directions:

  1. Preheat waffle iron. Beat eggs in large bowl with hand beater until fluffy. Beat in flour, milk, vegetable oil, sugar, baking powder, salt, and vanilla, just until smooth.
    Everyone loved these waffles...even Oreo!!
  2. Spray preheated waffle iron with nonstick cooking spray. Pour mix onto hot waffle iron. Cook until golden brown. Serve hot.

    These waffles are super easy to make. Hope everyone enjoys them as much as we did!

    Enjoy!

    Even while working on this post Oreo just HAD to have some waffles!!

Wednesday, April 3, 2013

Apple Cinnamon Chimichangas

Apple Cinnamon Chimichangas


These apple cinnamon chimichangas are treat! They taste like little apple pies. They would work as a dessert or as a small breakfast. If you want to indulge a little try drizzling caramel over the top! You can always warm them up again by putting them in the microwave to get that warm apple pie feel to them. 

Yields: 10 Chimichangas


Ingredients:

For Apple Pie Filling:
4 baking apples, Chopped
1 1/2 cups of water
1/4 cup cornstarch
3/4 cup sugar
1/2 teaspoon cinnamon
1/4 teaspoon salt
1 tablespoon lemon juice

For the Chimichangas:
8-10 small tortillas
1/2 cup sugar
1 tablespoon cinnamon
Oil for frying

Ingredients for Chimichangas

Directions for Apple Pie Filling:

  1. Combine the water, cornstarch, sugar, cinnamon, salt, and lemon juice in a medium saucepan. Bring to a boil. Cook for three minutes, or until the mixture becomes very thick.
  2. Add the chopped apples and reduce to a simmer. Allow the apple mixture to simmer until the apples become tender (around 10 minutes). Allow mixture to cool.
    Apple Pie Filling after it has cooled.

Directions for Chimichangas:

  1. Mix cinnamon and sugar in a shallow bowl and set aside.
  2. Spoon apple pie filling across the bottom 1/3 of the tortilla.
  3. Roll in both sides of the tortilla before rolling up the bottom of the tortilla over the filling, then continue to roll the tortilla up like a burrito.
  4. Meanwhile, heat a small skillet with 1/2 inch of oil. Once the oil is hot, fry the chimichangas on all sides until the tortilla turns golden brown. (30 seconds each side)
  5. Remove the chimichangas to a paper towel-lined plate and allow to drain briefly. Immediately roll the warm chimichanga in the cinnamon sugar mixture.

Thursday, March 21, 2013

Strawberry Scones

Strawberry Scones


Strawberry scones are a breakfast treat! These scones are great for family breakfast, tea time, or even a little treat. They are just like traditional scones and have that crumbly goodness. They have a nutmeg honey twist in them that makes them sweet for anyone to enjoy. I did substitute ingredients in this recipe, read at the bottom to see what I used to make my own scones!

Yields: 8 scones


Ingredients: 

1 cup finely diced fresh strawberries
2 cups white whole wheat flour
1/4 cup honey
1 tablespoon baking powder
1/2 teaspoon salt
1/4 teaspoon ground nutmeg
1/4 teaspoon sweetleaf stevia, liquid form
5 tablespoons cold, butter cut in 1/4 inch pieces
1 teaspoon vanilla extract
1/2 cup plus 1 tablespoon milk

Ingredients for scones

Directions:

  1. Heat oven to 425 degrees. Line a baking sheet with parchment paper.
  2. Lay the diced strawberries on a paper towel to absorb juices.
  3. Combine flour, baking powder, salt, and nutmeg in a large bowl.
  4. Using two butter knives, cut the butter in the flour mixture until pieces of butter are coated with flour the size of peas.
  5. Gently add the strawberries, lightly tossing them in the flour mixture.
  6. Make a well in the flour mixture and mix the milk, honey, vanilla extract, and stevia in a small bowl then pour into the well.
  7. Gently stir the dough and form a ball.
  8. Flour your hands and dust your clean counter surface with flour. Place the dough on the floured surface and knead a few times.
  9. Transfer the dough to the lined baking sheet and shape it into about an 8 inch circle.
  10. Using an oiled pizza cutter, slice the dough into 8 triangles. Use a spatula to separate the wedges.
  11. Bake the scones until they are golden brown about 18-20 minutes. Let them cool on the baking sheet for a few minutes then carefully slide them on to a wire rack to cool for another 15 minutes before serving.

After I made the strawberry scones I thought it would be a great idea to make orange cranberry scones as well. I love orange cranberry bread, and this weekend while grocery shopping I got dried cranberries and oranges. To make the orange cranberry scones I followed the directions all the same but instead of using one cup of strawberries I put a half cup of dried cranberries and a half cup of shredded orange skins. Then you continue the directions the same.

Orange Cranberry Scone

This was my first time making scones and it went well. I did not use 1/4 teaspoon sweetleaf stevia in liquid form I instead used 1 teaspoon of sugar. Also it being winter in Wisconsin and our local grocery store slightly over prices things I did not want to pay $5.00 for a regular sized container of fresh strawberries. So I picked up frozen unsweetened whole strawberries and they worked just as well it just takes longer to get the juices out and make sure they are not frozen. For milk you can use any percent of milk you would like. You can also use just regular flour instead of white whole wheat flour. I would also adjust the time to put them in the oven to about 15 minutes. You can see the picture of my strawberry scones on the cooling rack they are sort of burnt from being in the oven for 18 minutes. Make sure if you do put them in for 18 minutes that you watch them around 5 minutes left so they do not burn. (Luckily mine still taste very good!) 

Enjoy!


Source: http://www.sugarfreemom.com/recipes/clean-eating/

Thursday, March 14, 2013

Soft Lofthouse Style Frosted Cookies

Soft Lofthouse Style Frosted Cookies


These delicious soft sugar cookies with buttercream frosting topped with sprinkles are to die for! These are like the Lofthouse cookies you can purchase in the grocery store. These cookies are the perfect sweetness for anyone with a sweet tooth or looking for a sweet treat to enjoy. 

Yield: 4 1/2 dozen cookies


Ingredients: 

For the Cookies:
6 cups flour, divided
1 teaspoon baking soda
1 teaspoon baking powder
1 cup butter, at room temperature
2 cups granulated sugar
3 eggs
1 teaspoon vanilla extract
1 1/2 cups light sour cream

For the Frosting:
1 cup butter, at room temperature
1 teaspoon vanilla extract
4 cups powdered sugar
6 tablespoons heavy cream
Several drops food coloring
Sprinkles

Ingredients for cookies

Directions for Cookies:

  1. In a medium bowl, whisk 5 cups of flour, baking soda, and baking powder; set aside.
  2. In the bowl of a stand mixer with the flat beater attached, cream the butter and granulated sugar at medium speed until light and fluffy for about 3 minutes. Scrape down the sides of the bowl with a rubber spatula as needed.
  3. Add the eggs one at a time, beating until each is incorporated.
  4. Then add the vanilla and sour cream, beat at low speed until combined.
  5. Add the dry ingredients and beat at low speed until just combined for about 30 seconds, scraping down the bowl as needed. Dough needs to obtain the right consistency for rolling, so add additional flour, 1/4 cup at a time. (Up to 1 cup more of flour.)
  6. Divide dough into two sections. Flatten into rectangles about 1 1/2 inches thick, then wrap with plastic wrap.
  7. Chill in the refrigerator overnight.
  8. Preheat the oven to 425 degrees F. Line 2 large baking sheets with parchment paper or spray them with nonstick cooking spray, set aside.
  9. Generously flour a work area and rolling pin. With a rolling pin, roll the dough out to 1/4-inch thickness. Using a 2 1/2-inch round cookie cutter, cut out circles and transfer to a baking sheet.
  10. Bake for 7-8 minutes, until pale golden.
    Immediately transfer cookies to wire rack to cool.

Directions for Frosting:

  1. In a standard mixing bowl, cream together the butter and vanilla.
  2. Slowly beat in the powdered sugar.
  3. Once smooth and creamy, add in heavy cream 1 tablespoon at a time until the desired consistency is achieved. Add food coloring and beat until combined.
  4. Once cookies have cooled completely, frost and add sprinkles. Allow frosting to set, then store in an air-tight container.
  5. Let cookies sit for several hours before serving to allow the flavors to develop.

Monday, March 11, 2013

Welcome!

Hello Everyone!

A little about me:

I am Lindsey Moore. I currently live in the Madison area in Wisconsin. I am 20 years old. I currently attend Herzing University for graphic design. Recently I have found that graphic design is not for me and that cooking is more of my style and I also have a deep passion for dogs. I own a Boston Terrier Doberman mix named Oreo. I have been a animal lover my whole life. My future plan is to attend a culinary school out in California, then own my own bakery that serves not just pastry treats to people but to dogs as well!! 

I have always loved to cook. What makes me think I really wanted to go to culinary school is that I have a passion for it but most of all my dad was always making homemade meals when I was little. I loved watching him cook, and sing to the Beatles or blues music that was always playing while he cooked.  When I go to culinary school I plan on going into Baking and Pastry Arts. Who doesn't love sweets?! I love the art of decorating pastries all of the detail and hard effort put into making works of art with food really amazes me. I have been an artistic person my entire life, but not been able to really find where to put that artistic ability where I could make a career out of it, and I think I finally have! Cooking!!!

 Along with cooking I have always had a very deep passion for animals. I was (and still am) the girl who saves hurt birds, rescues injured rabbits, and picks up lost dogs off the street. I have had animals in my life since I was little mostly birds due to my moms allergies of cats and dogs. Until one day my parents decided that we could get a dog, I ended up getting my best friend Oreo. While I bake she is always at my feet,  when my boyfriend is not around she's my little taste tester. This is how I came up with the idea of baking food for dogs as well. My dream would be to own a bakery out in California called The "Barking" Bakery where not only is there sweet treats for people but healthy treats for dogs as well. Where people and their companions can enjoy a little something sweet together outside.

Now enough about me! My blog will have recipes that I find online and make. I will write about my experiences and anything I would change. Also as soon as I start cooking school I will write about my experiences for anyone who is looking into becoming a pastry chef can see what my experience is like, and maybe they can find out if cooking is right for them. You can expect to see one recipe a week on my blog, with maybe an extra here and there. I hope everyone that reads this blog will enjoy it and...Bon Appetit!


Lindsey